Why You Might Want to Use a Laptop as a Monitor

Laptop with monitor

There are times when your desktop monitor just isn’t enough. If you’re in this position, then it’s good to know that you can use your laptop as a secondary display, allowing you to do tasks that you couldn’t do with just your desktop screen. We’re going to look at how you do this, both for Windows computers and Apple Macs. But before we get onto the how, let’s look at the why.

Why Would You Want To Use Your Laptop As a Monitor?

Man working with laptop

In the old days, when you’d be sat at your work or library desk, you’d have several documents or books laid out in front of you. You’d also have a notepad or exercise book in front of you so that you can copy down notes, compose a piece of text, or work on another document. Now that everything is digitalized, we don’t have this option.

If we use a single monitor, then we’re forced to minimize windows, and this can be very annoying at times. Having a second screen to look at means that you can do two things at a time. One monitor can be used for working, and the second monitor can be used for research purposes. You can simply do things simultaneously in an easy, user-friendly way.

A second monitor doesn’t just come in handy for work reasons. If you’re a keen gamer, then you may like the chance to be on a video call with a fellow gamer while you play or even to stream your favorite Twitch gamer while you’re playing at the same time. Sports fans might also like the ability to watch a live feed of a soccer, football, or baseball match while still being able to work or chat with a friend on a second screen.

What Equipment is Required To Use A Laptop as a Monitor?
Laptop connection port

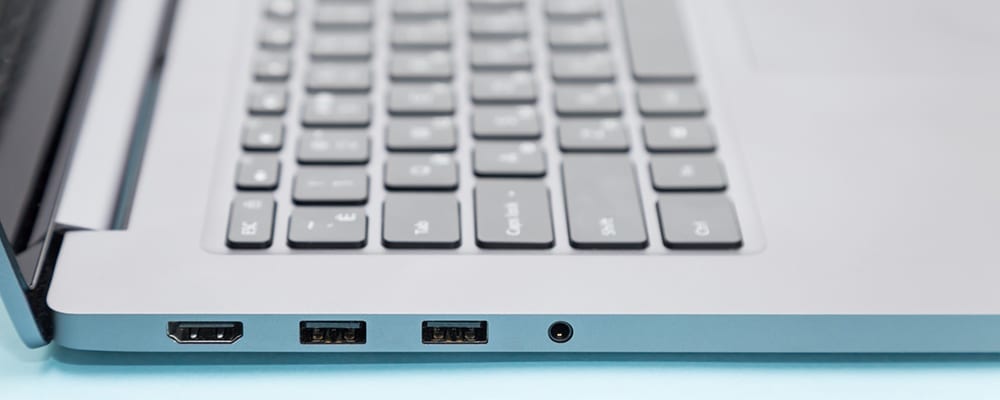
Of course, the first two pieces of equipment that are required is a desktop computer and a laptop, so that you can use the laptop as a second monitor. In the past, you’d need an HDMI cable to do this, but nowadays, Windows 10 has the capabilities to allow you to connect laptop to monitor without any cables required.

As a result of this, you must make sure that you’ve got the latest version of Windows 10 on both the laptop and the desktop or laptop you want to use as the primary monitor.

How To Use Your Laptop As a Monitor With a Windows-Based System

Google search

There are a few different ways you can use your laptop as a monitor with Windows. The first is to download the Space Desk app. Space Desk is a user-friendly app that allows you to both mirror and extend your original desktop or laptop screen with a second laptop.

The easiest way, however, doesn’t require an app. It can be done simply through Windows. Let’s look at how you’re able to use your laptop as a second screen.

The first step is to open up the laptop, log in, and then go to Settings. This is on the laptop you want to be used as a second monitor. You should be logged in already on another device, which is the main one you want to use, whether that’s a desktop or a laptop.

Now that you’ve opened Settings, you should click on System. Once you’ve clicked on System, you’ll have a lot of options, and you want to find the one that says Projecting to This PC.

After clicking on Projecting to This PC, you’ll find several new options available to you.

Each of the four options that you will now be faced with will offer you different levels of security.

If you’re planning on using the laptop as a second display only at home, then you can be sure that your system is secure, so you won’t need to add a PIN each time that the laptop is used as a second display. But if you’re in a work environment, then you may want to make sure that use the most advanced security settings, as another device can connect to your laptop without your permission if you don’t.

Now that you’ve allowed your laptop to be used as a second display, then you can move over to your desktop or second laptop.

On the main computer that you plan to use – whether it’s a desktop or laptop – then you have to press the Windows key, as well as P at the same time. You’ll notice a sidebar on the right-hand side of your screen. There are four options. You can choose PC Screen Only, Duplicate, Extend, and Second Screen Only. It will also say Connect To A Wireless Display underneath.

You then want to choose one of the four options.

PC Screen Only means that you will not use a laptop for a second monitor. Instead, you will just be using your current display. And this means that nothing will change with your system.

Duplicate means that your laptop will display the same thing that your desktop monitor shows. Duplicate can be handy for some people. For example, if you want a different sized screen to view the display from your main desktop or laptop system.

Extend is the option that most people use for a laptop as it allows you to extend your desktop monitor to the laptop. This will allow you to display one thing on the laptop screen and display something else on the main desktop or laptop in use.

Once you’ve clicked on the right option for your needs, you’ll have to head over to the other laptop and accept the projection request so that you can use this device as a second display.

You should also make sure that you disconnect both devices when you’ve finished using the laptop as a secondary display.

How To Use Your Apple Laptop As a Monitor

Apple laptop

If you’ve not got a Windows system, and instead have an Apple computer or laptop, then the process is different.

Apple makes things user-friendly as always, so it will only take you a few seconds to set up your Macbook as a second display for your Mac.

First, on your Mac, you want to go to the System Preferences page.

Now you’re there, you’ll see quite a few options, and the one you want to click on is Displays.

That’s it, as long as your second display Macbook or iPhone or iPad is nearby. But, there are times when it hasn’t automatically detected the other device. If that’s happened for you, then just click on Detect Displays. After a few seconds, your Mac will have detected the device you plan to use as a second display.

What to Do If You Use an Older Form of Windows?

Windows 7

If you’re still on Windows 7 or Windows 8, then you won’t be able to follow the instructions that we’ve given for setting up a laptop to be used as a monitor for another laptop or desktop. You will need to purchase an inexpensive piece of equipment so that you can do this. You’ll need a Microsoft Wireless Display Adapter.

This piece of equipment will easily connect to any laptop that’s got an HDMI or a USB port. Actually, this is also a very practical piece of equipment for anyone who doesn’t have wireless internet at home. It allows you to connect two devices for screen-sharing purposes without an internet connection.

Summary

By following the instructions in this article, you can easily turn any laptop into a second screen for a desktop or laptop. For both Windows and Apple users, the process takes a matter of minutes. It’s very useful to be able to have a second screen. It allows you to be able to look at two things at the same time. You can multi-task. And that’s handy for everyone from office workers to gamers to people just wanting to be able to watch something on one screen while working on another screen.

It’s always important to remember to think of your security. If you’re using your two computers in a public setting or with a shared wireless internet connection, then make sure to use the most advanced security settings, such as having a PIN for connections. This means no-one can access your laptop when it’s open to being projected. You should always turn off the projection settings once you’ve finished sharing the screen for this same reason.

Enjoy the benefits of using a laptop as a monitor for your main computer. You can now multi-task in a whole new way.
How to Build a Laptop: Full Guide (It’s Easier Than You Think!)

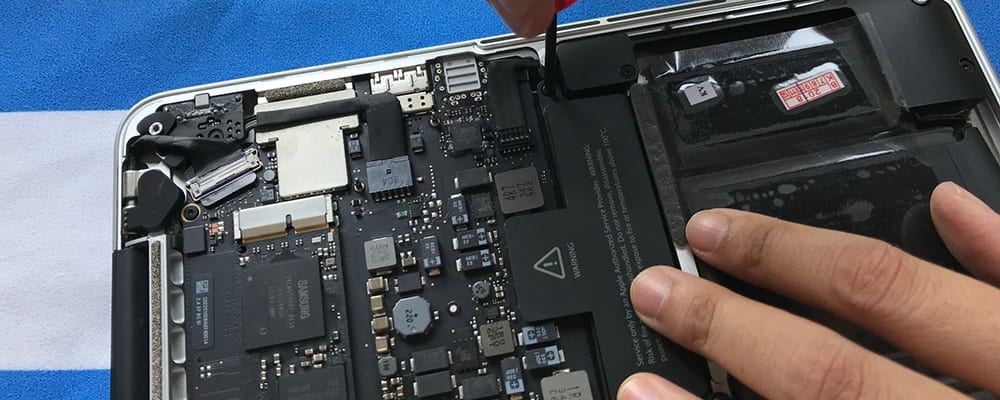
Technician fixing laptop

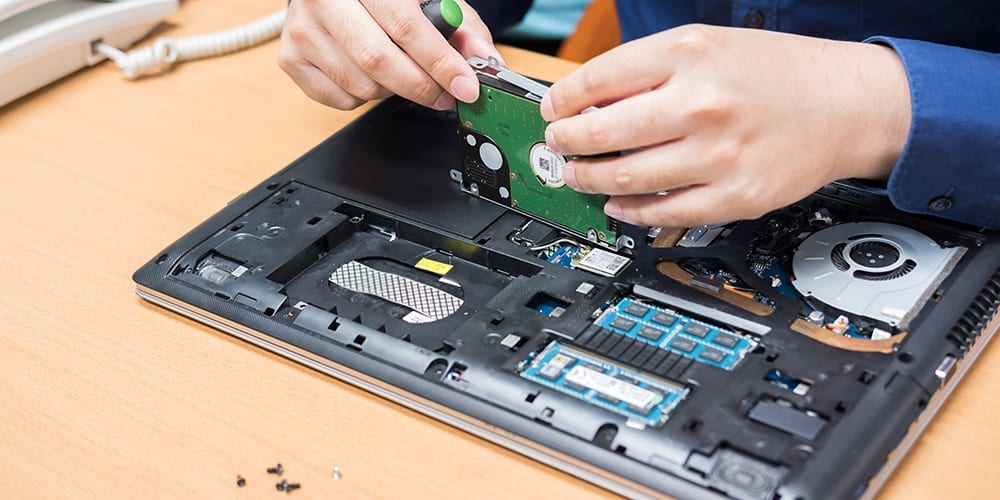
Are you thinking of building a laptop? If you build your own laptop, then you can create your dream computer with all the parts suited to your needs. You also will have a sense of achievement when you’re finished.

But building a laptop is a time-consuming task, and it isn’t possible to do it entirely from scratch unless you have experience with soldering and working with electronics.

If you’re happy to buy some pre-built pieces and assemble them in a ready-built case, then you can assemble a laptop. There are lots of questions you have to consider before you set out on the road to making a laptop. We’re going to answer some of the most important ones now. Let’s get started.

Is It Possible To Build a Laptop Yourself?

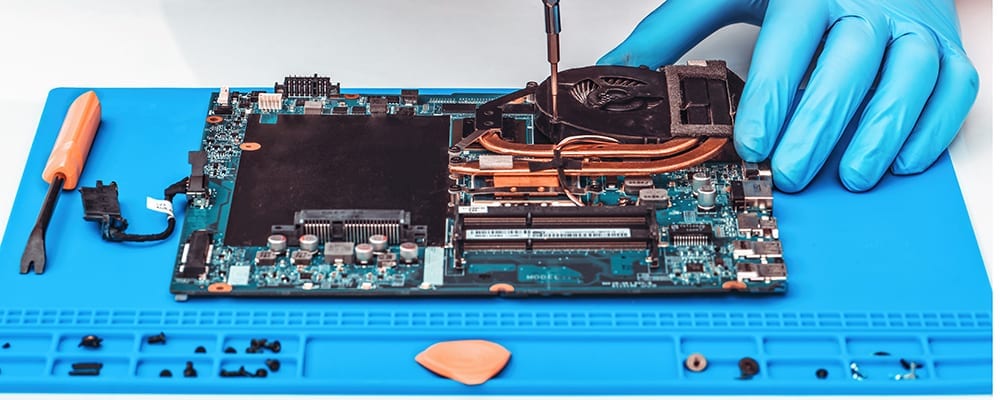
Repairing laptop

Yes, it’s possible. But building a laptop takes time, and you have to be willing to follow instructions carefully. You’ll also need to be confident with the steadiness of your hands, as there will be lots of screwing and putting together parts. You also might have to do some basic coding, if you’re not beginning with a barebones laptop.

But if you’re willing to take the time to research the methods properly, as well as purchasing the right components, then it can be a genuinely satisfying task. You’ll know that each time you open your laptop to use it, you’re the one responsible for its construction.

It’s important to remember, however, that the building process is only one element of making your own laptop. To build a good laptop or even a functioning computer, then you need to ensure that you buy the right components – ones that are compatible with each other.

Many parts for laptops are built to fit specific laptops. That means that you might need to get all the parts for a Lenovo computer, for example, and then assemble them.

How Much Does It Cost to Build a Laptop?

Laptop

It’s impossible to answer this question as it will depend on the laptop you choose to build. You will need to pay for the components, and that means you have a vast array of prices that you might pay. For example, a hard disk drive can be bought for $20, or you could buy a hard disk drive for $200. It’s the same as a pre-built laptop.

You can purchase one for a small amount or spend thousands on one. If you do decide to keep the costs down and want to build a basic computer, then it’s possible to purchase a barebones laptop for approximately $600. You need to buy RAM, CPU, a hard drive, etc. so you can build a basic laptop for less than $1,000.

The main reason why people tend to purchase laptops rather than build them themselves is to do with cost. It can work out to be a costly job, building a laptop. It is, however, a different story when it comes to building a desktop. If you plan to make a computer, then you should ask yourself beforehand if it’s a laptop or a desktop that you want.

What Tools Do You Need?

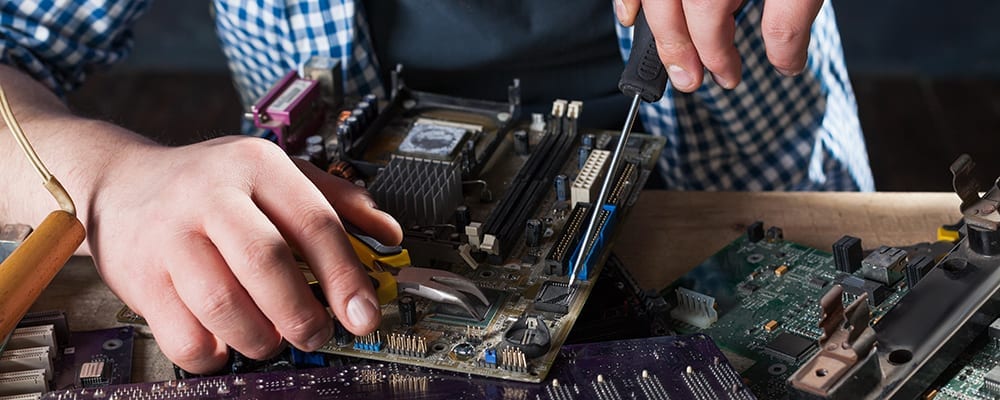
Repairing laptop

Fortunately, you don’t require many hard-to-find tools to assemble a laptop. All you’ll want is the right screwdrivers. Many experts recommend purchasing a set of screwdrivers that jewelers use. This is because they are small, delicate, and that makes them perfect for the little screws that you’ll be using to fit the parts into your hand-built computer.

Another handy tool to have is a set of needle-nose pliers. Why? Because building a laptop requires you to be able to control lots of tiny screws, and there’s a good chance that they will fall down cracks at some point. Having these pliers will allow you to retrieve them easily. You’ll also want to make sure that you don’t destroy the laptop before it’s built.

You will give off electrostatic discharge, and that’s a killer for the components that you’ll be fitting inside the computer. To avoid destroying the laptop, you will have to get yourself an antistatic wristband. This will ground you so that there are no worries about your electrostatic discharge damaging the laptop.

Is It Cheaper To Build a Laptop Or To Buy a Laptop?

Laptop on a wooden table

It depends. It can be cheaper to make a laptop, but it can also work out to be very expensive, too. There are lots of affordable laptops on the market. If you’re not happy with the off-the-shelf laptops that are out there, then a custom laptop is a preferable option than building your own. You can customize a laptop with most of the big manufacturers.

You simply go to their website, then find the area for a customizable laptop. With a custom laptop, you can then choose the exact parts that you want. For example, if you want a powerful CPU, you can choose a powerful CPU. If you’re going to make a laptop for gaming, then you can choose the right specifications that are directed towards gaming.

Laptop customization can work out a lot cheaper and straightforward than making your own one. It might be a fun idea to build your own laptop, but make sure you do your research into the cost of components before you go down this route. Finding a manufacturer with a laptop customizer area on their website could save you lots of dollars in the long run.

How Hard Is It To Build a Laptop?

Man fixing laptop

The hardest part isn’t building it. Finding the right components that work together is the hardest part. You will have to do a lot of research. The CPU has to be compatible with the hard drive. Then they both have to be compatible with the RAM and so on. Choose one wrong part, such as the CPU, and the whole laptop doesn’t work.

The actual building process is the easiest part of the process. All you have to do is to screw in the right components. This is, of course, working on the theory that you intend to build it with pre-made pieces. If you’re considering building everything entirely from scratch, then you’ll have to have expertise as an electrician. You would have to solder the wires inside the power cable, insulate the wiring, etc. This is not an easy process, and it isn’t recommended to anyone who doesn’t have experience.

And then, if you’re taking this route, you also have to think about the casing, for example. It’s possible to create a laptop case with a 3D printer, but you’d have to get a 3D printer. This would just add to the cost again. You have to ask yourself if it’s worth it to invest so much money to make your own computer when you can get a perfectly good custom laptop for a lot less money.

Conclusion

Building a laptop entirely from scratch is a task reserved for people who have the time and skill to be able to create every single part, including the case. It requires an ability to solder, work with electronics, and to program too.

To assemble a laptop with pre-made components and a barebones laptop, then you simply require the right screwdrivers and some pliers for when the screws get dropped between cracks. This is an easier process for most people. But it still isn’t easy. You have to ensure that you research each part before you buy it, as some will not be compatible with others.

The question, in the end, that you have to ask yourself is simply: is it worth it?

How you answer, that will depend on your reason for constructing the laptop yourself. If you want a challenge, and want a sense of achievement, then it’s worthwhile to spend time researching so that you can then create the laptop of your dreams.

But if you think that making your own laptop will save you money, then you’re probably best taking another option. Finding a manufacturer that allows you to customize a stock laptop will be a much better way of saving money on a high-quality computer.

How to Uninstall Blizzard Games

Blizzard games

Blizzard Battle.net is the home of some of the most popular online games around, including the Battle.net 2.0 favorites, World of Warcraft, Overwatch, and Call of Duty. Blizzard Entertainment Inc has been developing these games ever since Battle.net was launched back in 1996.

Kid playing online game

Ever since 2008, the parent company for Blizzard Games has been Blizzard Activision. Blizzard Activision also owns Major League gaming, as well as several other subsidiaries.

If you’re a keen user of Blizzard Battle.net games, then you’ll know that they can take up a lot of space on your laptop, and that means that you’ll sometimes want to remove a game so that you can install another game. We’re going to have a look now at two different methods so that you can uninstall a Blizzard Battle.net game from your gaming laptop. Let’s go.

Method One – How to Uninstall Blizzard Games Through the Blizzard Battle.net App

Blizzard battle.net logo

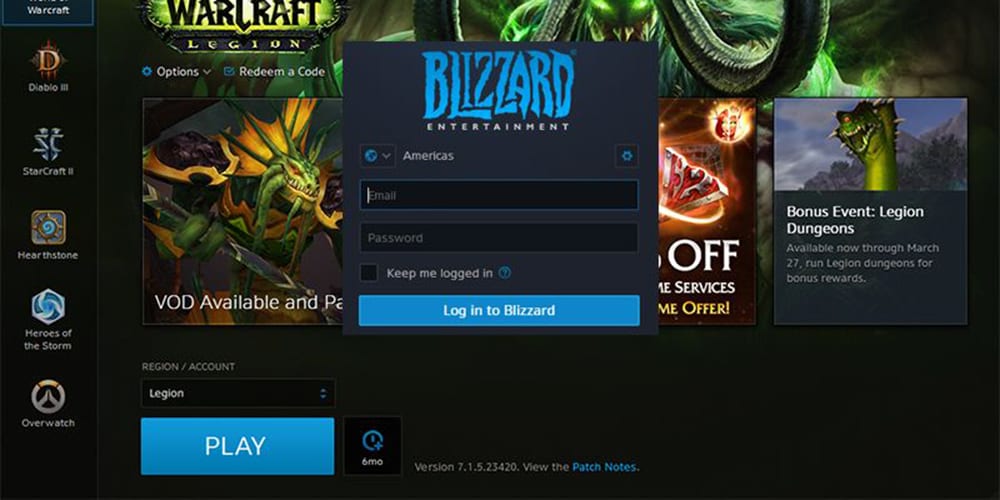
The easiest way to uninstall a Blizzard Battle.net game is through the Blizzard Battle.net app. You’ll have this installed so that you can download and play Blizzard Entertainment Inc. games. This app requires you to log in with your Battletag user email address. Once you have logged in with your Battletag user email and user Battletag code, then you can start the process, and uninstall the desired game.

Now that you’ve opened the Blizzard Battle.net app, you will see a list of all the Blizzard Battle.net games that you currently have installed on your device. Click on the tab for the game that you want to uninstall. Then you should click on ‘options.’ Now you will see a list of options, one of which will be ‘Uninstall.’ You just need to select ‘Uninstall,’ and the game will remove itself from your computer.

This method to uninstall a blizzard game will work for Windows users, as well as Mac users. If you have a Mac, you’ll need to log into the app with your user Battletag name and user Battletag code. If you have Windows, you’ll need to do this too.

Method Two – How to Uninstall Blizzard Games Manually Through Control Panel

Control panel settings

Some users of Blizzard Battle.net games might have difficulties with the previous method when they try to uninstall the game. One problem that people run into is that all the files are not uninstalled with the game. This next method will allow you to uninstall the game in the same way you uninstall a program.

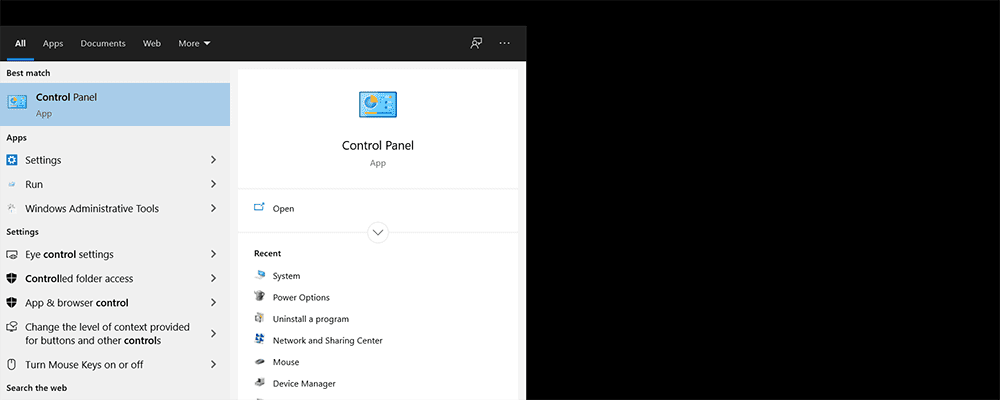
You first need to open the control panel on your Windows computer. Once you’ve opened it, then you want to locate the page that’s titled: ‘Uninstall a Program.’ Click on it. And then you’ll have a list of programs that are installed on your computer.

Next, you should find the Blizzard Entertainment game that you want to remove.

Then, you need to right-click on it.

When the options come up, you’ll want to select ‘Uninstall.’

There are times when you won’t see the Blizzard Battle.net game in your list of programs. But this is not an issue, as you can delete the Blizzard Battle.net game through a different method. You need to search for the game in your directory. You can do this by opening Windows Explorer and typing the name of the Blizzard Battle.net game into the search box. You can then simply delete the folder and the files that are inside it.

If you manage to delete the Battle.net game through either of these methods, then you’ll still need to delete temporary files that are associated with the Blizzard Battle.net game. To delete these files, you need to go to the temporary files area and select the folder with the game title. Delete the folder containing the files.

Doing this will not affect other Blizzard Battle.net games associated with your user Battletag. You can still use the Battle.net games that you have as normal, as well as play with your user Battletag.

Through following either of these methods, you should now have installed the Blizzard game.

This is How To find Out How Much Ram Your Computer Can Take

Laptop RAM memory

If you’ve noticed your computer acting a little sluggish recently, then there’s a good chance that you’re running out of memory, and one good way of improving the efficiency of your PC or laptop is by increasing the amount of RAM that it holds. But how do you do this? We’re going to answer this question and other essential questions in this article.

How Do I Find The RAM Capacity of My Computer?

Man using laptop

Before you’re able to add to your RAM capacity, you need to work out just how much RAM you currently have, as well as the maximum capacity that your computer’s motherboard can hold. Fortunately, this is an easy process for both MAC and Windows users.

If you own a Windows-based computer, then the first step to determining how much RAM your computer holds is by typing ‘System Information’ into the Windows search box. Then click on the System Information app. This will load a new box that will tell you both pieces of information you require. Firstly, you should see in the list ‘Installed Physical Memory (RAM).’

This is the amount of RAM that’s currently installed on your computer. To find out how much more RAM you can install, you want to locate the System Model, which is also in this list. You should then find the relevant information for your model on your manufacturer’s website, which will tell you how much more RAM you can add to your motherboard.

If you’re a MAC user, then to check the memory capacity of your hard drive, you will need to go to the About This Mac page, which you can find on the Apple Menu. You should see an option that says More Info. Click on it and then click on Hardware Overview. You should see an option for Current Memory Information on this page. Then, you’ll see how much RAM you have.

What Is The Maximum Amount of RAM a Computer Can Have?

Computer motherboard

A high-performing computer will usually have 8gb of RAM. This amount of memory will allow a computer to efficiently and effectively perform its duties. If, however, you currently have 8GB of Ram, and you think that you’d like to upgrade, then your next option is 16GB of RAM. If you have 16GB Ram, then you will be able to perform highly advanced tasks on your computer, such as virtualization based tasks. It’s possible to get more than 16GB of RAM; you may need to upgrade to a more advanced form of Windows, if you use it, and check that your operating system is capable of running this number of RAM for computer.

How Do I Add Ram To My Computer’s Operating System?

Man putting RAM on the motherboard

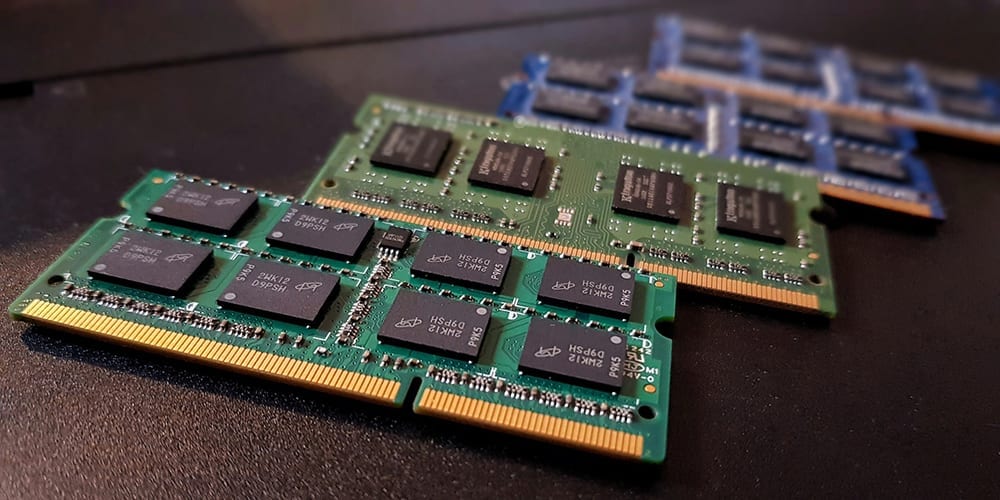
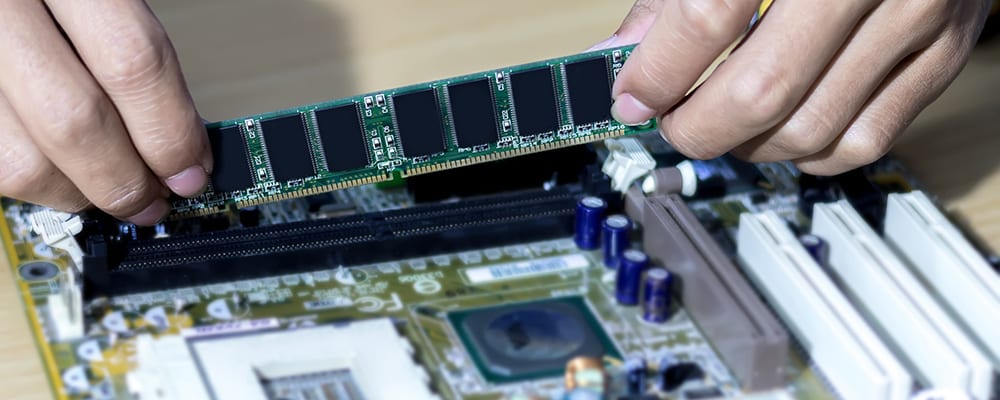
You need to replace your RAM DIMM that’s fitted into your motherboard. This is the same if you’re a desktop or laptop user. You first need to find out where your RAM DIMM is on your motherboard. You also need to check what type of RAM is compatible with your motherboard. You’ll see on your motherboard that there are a certain number of slots available.

These slots are the number of RAM DIMM that you can install. Always make sure that your computer’s motherboard slots can accommodate the type of RAM DIMM that you purchase, otherwise it may harm your system. The process of replacing the RAM DIMM is quite simple.

Still, it differs from computer to computer, so it’s recommended that you use the information on your manufacturer’s website where you will find the right type of installation for your specific computer.

What Is RAM for a Computer and What Benefits Will I Get by Increasing It?

Random Access Memory

RAM stands for Random Access Memory. It’s the quantity of short-term memory that your computer will be able to use. Your system constantly uses this form of memory for everything that it does. Everything that you do on your computer is dependent on this form of memory. And that means that if you want your system to run more quickly and effectively, then you want to increase the quantity of Random Access Memory that it has.

If you do increase the quantity of RAM, then you will firstly notice that your computer runs more smoothly and quickly with all the tasks that it performs. You will also be able to use software that was previously unavailable to you. People who use computers for technical work, such as graphic design, will benefit from an increase in RAM.

Video gamers also can find that their system works better with an increase in RAM. Generally, though, for most home users, the in-built level of RAM should be enough for tasks like browsing the internet.

How To Screenshot On An ASUS Laptop

Asus Laptop

So, you got yourself a new ASUS laptop! With all the photoshop programs and photo-editing extras available for laptops nowadays, anyone can be an amateur photographer. The ability to take screenshots on your ASUS laptop is an important part of saving and sharing all of those special moments you want to capture.

Or perhaps you work from home, and you need to send an image of your project to your boss. Whether you need a screenshot of the whole screen or just part of it, you can take your screen shot, tweak it, edit it, and then turn it into a perfect photo that you’ll want to frame and hang on your wall.

You can do this all with your new laptop. All you have to do is learn the process of taking a screenshot with your ASUS laptop. Don’t worry – you don’t have to be a laptop genius to do it.

An important point to understand is that new ASUS laptops run on a Microsoft Operating System; think Windows 7, Windows 8, and Windows 10. The good news is that the process for taking a screenshot on all of these Windows models is generally the same!

If you purchased an ASUS laptop that is Windows 10 or newer, it should come with the entire Windows Suite, so taking screenshots will be even easier. You won’t have to purchase or download any new programs (i.e., photoshop tools or any other editing features).

A photograph is a moment frozen in time, as is a screenshot. Perhaps you have an image on your laptop that you’ve already taken with your phone or another device you want to make into a gift or memento. Or maybe you want to impress your boss with what you’re working on from home. Your ASUS laptop is ready to capture these moments for you.

That’s why we’ve created this easy-to-follow, step-by-step guide for you to learn how to take “picture perfect” screenshots with your new ASUS laptop, making screen shooting easy and fun. We’ll be talking a little bit about Editing, too. There are two different situations or setups in which you may be taking your screenshot; don’t worry, we’ll be covering it all!

How To Screenshot On ASUS Laptop With A Single Shot Screen

When utilizing this method, you can take a screenshot by simply pressing a few keys on your keyboard called “hotkeys.” In this situation, you’ll only be taking your screenshot on ASUS laptop or single desktop – that is, it will not be connected to any other device.

Asus laptop keyboard

This is called a “single-screen” screenshot. You’ll simply be working with just one whole screen. This screenshot process is what you’ll use if you have a Windows 7 or Windows 8 ASUS laptop.

Step 1: Look at your Windows 7 or 8 keyboard and find the [Windows] and [Print] keys; press the [Windows] key first, hold it, and then press the [Print] key. Just those two keystrokes will take a screenshot!

Step 2: Find your Image folder. There should be a tab or folder labeled “Screenshots” within it. You should see the image of the screenshot you just took. This is where all of your screenshots will “live” until you move them to a different folder.

Step 3: An extra “FYI.” You can also simply press the [Print] key, and this alone will still take the screenshot. However, now it will “live” in your clipboard instead of in the Image, Screenshots folder.

Step 4: If you want to Edit or play around with the screenshot you’ve just successfully taken with your ASUS laptop, you can open your favorite editing or photoshop program, insert your screenshot, and edit away! If you want to save your screenshot as an image, insert it in your chosen editing program by pressing [STR]+[V].

How To Screenshot On ASUS Laptop When Connected To Multiple Devices (Working With Multiple Screens)

Person using laptop

At times, you may be working with multiple desktops, or a desktop and a laptop. In other words, you may have more than one active window open on a few different monitors. This may sound overwhelming, but don’t worry. Taking a screenshot on ASUS is never complicated! The following steps are those you’d follow if your ASUS laptop runs on Windows 10 or newer.

Step 1: Pressing [Windows]+{Print} will take the screenshot, and will send it to both your Clipboard and to a file in your Images folder. This key combination will take a screenshot of all monitors, given that they are all connected to your ASUS laptop and or active window. The same screenshot will show up on all monitors!

Step 2: To edit your screenshot, paste it into a compatible photoshop or Editing program, which should have already come with your Windows 10 (or newer) software.

Step 3: Have fun Editing your screenshot. Your Windows 10 software likely includes Adobe Photoshop, which is an excellent photo-editing program!

A Few More Quick Tips and Tricks For Editing (And Taking) A Screenshot On ASUS Laptop

Asus laptop top view

If you take your screenshot by simply using the [Print] key, the CTRL+V is the shortcut key combination to Paste the screenshot from the Clipboard into your Paint program, Adobe Photoshop, or even into Microsoft PowerPoint.

Perhaps you don’t want a screenshot of the whole screen, and only need to take a screenshot of one small part of it, such as a website URL, information from one window, or graph, or a single paragraph from an article, etc.

No worries! To take a screenshot of only a small portion of the active window, hit [Alt+Print]. This will save the screenshot to the Clipboard. When you paste it into your editing program, check out the toolbar at the top of the screen. You can use a crop or snipping tool to “cut out” the parts of the screenshot you don’t want.

After you take a screenshot and want to trim it down immediately after, do so by using the snipping tool. It’s the most efficient way to Edit your screenshot and the best way to capture a small portion of the whole screen that you want. It’s the tool that is most easily accessed in your Windows Start menu.

By doing a little dragging with your mouse, you can copy an area of a screenshot that you want directly to your clipboard. Simply draw lines around the area with your mouse. This is much faster than saving the entire screenshot to your Images folder, opening it, and then cropping it.

If you find that you take screenshots in your internet browser a lot, you might want to consider some add-ons or an in-browser extension. Mozilla Firefox and Google Chrome are the go-to’s for most ASUS users.

Conclusion

You may want to take a screenshot for many reasons, whether those reasons are personal or business-related. When you want to learn how to screenshot on ASUS laptop, it might sound a little intimidating at first. If laptops and techy gadgets aren’t your forte, you may not know how to take a screenshot on any laptop. In today’s world, where more people are working from home, knowing how to take screenshots might become an essential part of the day-to-day process of your job.

An ASUS laptop might just be the best tool to learn how to take a screenshot and how to edit it as well. A screenshot on ASUS will always be an easy and efficient process, no matter if you’re working with one screenshot screen on your ASUS laptop, or if you’re dealing with multiple monitors and desktops.

When you’re about to take a screenshot, knowing if or when to press the Windows button is essential. The type of Windows software you have on your ASUS laptop will make this a little clearer. Remember that some key combinations only work with newer Windows software.

No matter what software you have, however, simply press the [Windows] key+[Print], and this will at least take a screenshot and save it to your Clipboard. Think about what you require of your screenshot on ASUS; do you need a shot of the entire screen or just a small portion of it?

Whatever you want to take a screenshot of, and no matter the size you need, there are tools for that. Simply play around with your toolbar, and decide if you need any add-ons or browser extensions. It’s amazing what you can do with just a screen and a keyboard!

What is a Good Upload Speed for Gaming?

Computer upload

If you are a gamer, you know your internet connection and speeds play a role in how smoothly your game runs. There is a lot of debate about what the best upload speeds for gaming are. Additionally, there are several things to consider, including speeds of uploads and downloads, latency, and ping rates. If you’re not into technology, all of these terms can sound foreign.

If you’re unsure whether you have the correct upload speed for your internet-based gaming, continue to read and find out what you need. Regardless of if you like to game on occasion or if you’re avidly playing with your friends, upload speed matters. You don’t have to continue to wonder if what you have will accomplish your gaming needs.

The best internet service providers will be able to inform you about all the different aspects of your internet package. They will be able to educate you about speeds, as well as issues, such as latency and network connection. The ability to reach out to your ISP is critical. If you run into a problem, they should be right there to help you figure it out and get your gaming back on track.

If you have multiple people gaming in the same household, you’ll need a beefy internet plan. Making sure you all have the capacity to upload and download as you play your games will ensure that everyone has an excellent time and a stable connection.

Most of the time, if you call customer service and let them know your connected electronics situation, they’ll be able to inform you of the plan you need so that all of your devices have seamless access.

Are Speeds Really That Important When it Comes to Gaming?

Online gaming

The straightforward answer is yes. Your internet speed, high as it may seem, may not be enough to give you a smooth gaming experience. Slower internet speeds will produce lag time and buffering. These two things can mean the difference between winning and losing your internet gaming session. If you’re going to lose a game, it should be from a lack of skill, not from your internet speed slowing you down.

Your internet connection and speed will also play a role in your ability to use streaming services like HULU and Netflix. If you don’t have the correct internet speed, you’ll have interruptions throughout that show you’ve been dying to watch. This is irritating and completely avoidable. For improved watching and gaming experience, you need dependable download speeds.

What exactly are upload speeds?

Keyboard upload button

Upload speed is how long it takes for data to transmit from your gaming device to an internet server. This time is measured in Mbps or megabits per second. When you attach a file to an email and send it off through the internet, you are using upload speed. The higher the megabits per second, the faster your email will be on its way.

On the opposite side are download speeds. When your computer or gaming console receives information from a server, it’s referred to as download speed. Good examples of this are loading websites and streaming videos. If your internet speeds are fast enough, you won’t face a lot of lag time or buffering.

More often than not, download speed is the priority of your internet service provider. When gaming, it’s vital for you to have a high internet speed. Some ISPs will give you the same amount of upload and download speed, but that’s not frequent. When you’re looking for a great gaming experience, you really need to pay attention to the download speed.

Most broadband packages from an ISP will give you faster download speeds, which will make online gaming exceptionally smooth. The best internet options for gaming will always give you significant download speed. Gamers tend to need to download much more information than they upload. Hence the priority of internet speeds geared toward downloading.

What is the appropriate internet speed for gaming?

Wireless router

If you’re a gamer, upload speeds will be more important for you than the average internet surfer. It doesn’t take much speed to browse Twitter and stream the occasional film. When you’re gaming, data is continually being sent to and from the server. Between the actions in your game, messages with other players, and changes you make while playing, speed will make it all happen effectively and without delay.

When it comes to your upload speed, you only need about 1 Mbps. While 1 Mbps doesn’t sound like much, it’s a sufficient speed for gaming. If you’re unclear if you meet this 1 Mbps requirement, there are online tools to check your rates. Additionally, you can get ahold of your ISP, and they will be able to let you know if you are hitting this mark or not.

What type of speed will a professional gamer need?

Professional gamer

Upload speed for gaming on a professional level is going to look a bit different than the speeds used for average gamers. More and more players are making a living by streaming their games for fans across the globe to watch. This has made upload speeds a bigger concern as it allows you to take your gaming to a professional level.

You will need more than 1 Mbps upload speed when you plan on streaming your gaming content. If you want to be a professional gamer, you have to have high-quality, reliable streaming. Your fans will not tolerate bad speeds and poor quality when it comes to your stream.

If you’re trying to stream in 1080p, you’ll want an upload speed of at least 5 Mbps. It can be hard to find an internet service provider that can guarantee uploading speeds of 5 Mbps, but if you can find it, snatch it up. You may find that 3 Mbps is the best that you can get in your area.

This may be enough for smooth Twitch streaming, but know that 3 Mbps may still make for choppy viewer watching. Even some of the best internet providers will only offer 3 Mbps. Know that you will likely be happy with this internet speed for gaming, even though it could cause some lag time during your streaming sessions.

Other than speed, what else should a gamer consider when it comes to internet gaming?

Internet cafe

A good internet connection is needed for you and your viewers to enjoy your gaming experience. However, there are some other things you’ll want to make sure you understand and check with your ISP about before truly great online gaming can commence.

Download speeds and uploading speeds are essential. They can be a bit confusing in themselves, but there is more that must be considered. Your internet connection has a lot of variables other than internet speed. Let’s look at the different terms you should get familiar with.

This way, you can check with your ISP and make sure you’re getting what you need, so you have plenty of speed for gaming, as well as a smooth Twitch stream for all of your followers to watch.

Latency: Latency is described as your internet connection’s response rate. If there is high latency, your internet speed for gaming will not matter. High latency will cause a lot of lag time, even if you’re working with uploading speeds of 3 Mbps or better. The ping rate measures latency. The ping rate is the millisecond measurement of your latency.

Many people don’t consider the ping rate, but it’s vital. Your ping rate actually checks how much time it takes for data to get to the server and then the server to respond. You want a ping rate that is less than one hundred and fifty. Ideally, your ping rate should be less than one hundred. There are online tools you can use to check your ping rate.

Additionally, you can reach out to your internet services provider and discuss your ping rate with them. Ping rates can vary from day to day, but more often than not, your ping rate will be pretty standard. This might be a problem that will require you to search for a new ISP.

Data Caps: Internet companies do not use data caps as often as they used to. However, it is still possible that your internet provider has them. Online gaming does not use a whole lot of data. However, downloading new games does. If you go over your data, you could be facing hefty fees.

So, while internet speed for gaming is important, it is also important to understand the ins and outs of your internet plan. The best internet providers will not put caps on the amount of data you use.

Throttling: Some broadband ISP will use throttling during peak hours to limit the bandwidth. This is going to affect your gaming experience because it increases the ping rate. Internet providers that use data caps tend to also utilize throttling. You can speak with your internet provider’s customer service team and ask questions to find out if throttling and data caps are going to be an issue for you and your gaming needs.

Customer Service: Not everyone considers customer support when it comes to their internet options. Comprehensive customer service will give you the answers you need if there’s a problem with your broadband internet connection. This is whether your internet speed seems to be slow or your fans are complaining about latency issues.

Customer support should be there to tell you what’s going on and how long it’s going to take to fix it. Your internet speed for gaming needs to be reliable, and solid customer support can help ensure you are well taken care of.

Network Reliability: Your internet’s network reliability is going to make or break your idea of whether or not you have the best internet or the worst. When you play games on the internet, you need a reliable internet speed and a secure network.

An unreliable network could end with you losing connection completely. This can be devastating if you’re in the middle of a battle or you have not saved recently.

Should I connect via WiFi when playing games online?

Router with wifi

It’s best to hardwire your gaming console or your computer to the internet rather than using your WiFi connection. A WiFi connection is suitable for most things. However, when you want the best internet gaming experience, a hardwire connection will be smoother and faster.

Wireless signals are more prone to interference, and this can interrupt your gaming session. The best internet solution for your successful gaming is to go with a solid hardwire connection between your device and your router. If you do have to use a WiFi connection, you’ll want to make sure it’s connected to your home network as it’s a bit more reliable this way.

Conclusion

No matter what type of gaming you do, if you’re on the internet, speed is important. While there are many other components incorporated into an excellent online experience, start your research with speeds. Your location will play a role in the type of service you’ll be able to acquire. Unfortunately, not all areas will have access to highspeed broadband access.

The places that don’t have this available will likely need to go with satellite internet, and this can be frustrating. If you’re in a place to acquire excellent internet, take the time and talk to different companies before you decide which to go with. If gaming is essential in your life, this research will be advantageous.

You won’t have to worry about a game dropping out in the middle of a session, and your Twitch fans won’t become irritated over your choppy live stream. All in all, taking the time to understand your connection is the first step in truly great gaming sessions.